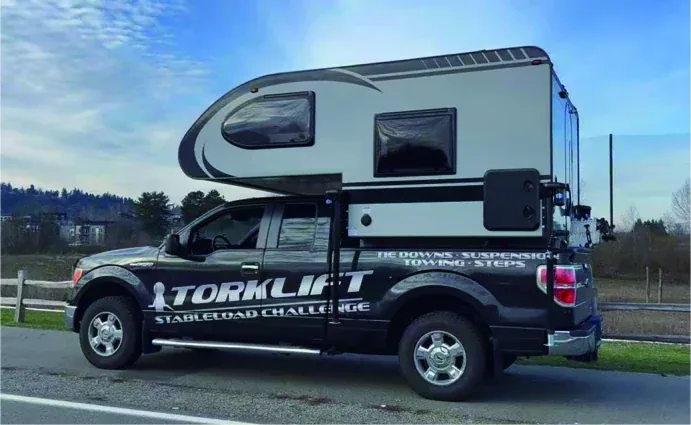
The exterior is the half of the build that is entirely yours
A pickup camper order runs in two halves. The first half is engineering. The body is made to the bed or chassis dimensions of the vehicle you name, the construction route is set by the model in the range, and the mounting is bolt-on and non-destructive, so nothing is cut or welded on the truck. You do not choose that half beyond naming the vehicles and the range.
The second half is identity. Body colour, graphic livery and window count are set per order. The catalogue model defines how the body is constructed; how it looks when it reaches your showroom is a decision you make and the factory produces. That is the whole point of a private-label programme, and it is also where most of the avoidable rework sits, because exterior decisions are easy to leave until late and expensive to correct afterwards.
What is fixed by the model and what you specify
The split is straightforward once it is written down. Anything structural follows the model; anything visual is yours to define on the order.
| Element | Decided by | What to settle before the order |
|---|---|---|
| Construction (aluminium or FRP) | The model in the range | Pick the model whose construction suits your market position, not a per-unit choice |
| Roof type (pop-top, hard-top, canopy) | The range you order | A range decision, made before any colour or artwork work begins |
| Mounting and installation | The body design | Bolt-on and non-destructive, with the mounting hardware on the order |
| Body colour | You, per order | State whether one colour covers the whole fleet or each model carries its own |
| Graphic livery and decals | You, per order | Send artwork with placement; approval is in writing before production |
| Window count per side | You, per order | Confirm the layout against your climate and privacy expectations |
| Badging and packaging | You, per order | Logo, packaging, manual and warranty wording carry your name, not ours |
Windows: the specification most buyers leave until too late
Window layout looks like a detail on a specification sheet. In practice it decides how the unit lives: daylight and cross-ventilation at camp, privacy on a crowded site, and how the body reads from the side in a photograph on your own website. It is also the exterior item most often assumed rather than stated.
The ranges differ here, which is why the count belongs on the order rather than in an assumption. The H1 and H2 hard-top bodies carry two to three outward-pushing windows per side and the count is adjustable — the number is agreed when the order is placed rather than fixed by the model. The T3 and T4 pop-tops come with dual outward-pushing side windows as standard. The T5 residence body carries outward-pushing windows on both sides, while the T1 and T2 pair one outward-pushing window with a slide-out expansion compartment. On the T6 the pop-top roof section itself carries windows. The canopy bodies work differently again: the all-aluminium high cover has wing windows on the left, right and rear, and the roof tent that opens out of it adds side windows of its own when raised.
The practical reading for a buyer is that window count is a line you control, not a property you inherit. If your market is hot, if privacy at a campsite matters, or if you want the unit to present a particular way in your catalogue, say so while the specification is being written. A window added at specification stage is a production line item. A window added after the body is built is a repair.
Colour and livery are two separate decisions
Body colour
Body colour is the finish the units carry, and it is set per order. Catalogue photography shows the standard schemes the factory builds; the production order can carry yours instead. Colour is one of the few exterior items where a private-label buyer normally wants a single answer across the whole fleet, because the fleet is what carries the brand. Treat it as a brand standard rather than as a note attached to one model.
Livery and decals
Livery is the graphic layer. Your logo and decals are applied at the factory, together with your own packaging, manual and warranty wording. This is the part buyers most often underestimate, because it is the only part of the build that has to satisfy a third party — your dealer, your end customer, and whatever consumer-facing wording your market expects.
Artwork is approved in writing before the units are built. The sequence matters more than the artwork itself: it means the graphic that ends up on the body is the graphic you signed off, rather than an interpretation of a logo sent as a low-resolution image. It also means the parts list and the artwork are settled at the same time, so nothing is fitted to a body that the paperwork does not describe.
Approving artwork without slowing the order down
The exterior sits inside the same order path as everything else: specification, quotation, production, inspection, shipping and after sales. Artwork belongs at the specification stage, because production starts against the approved specification and artwork. Move it earlier and the order does not slow down; leave it late and it does.
- Write the exterior into the specification: colour, livery and window count, model by model if the mix differs across the load.
- Supply artwork at a resolution that holds up at body scale, and state which panels it sits on.
- List the items that carry your name — decals, packaging, manual and warranty wording.
- Approve the artwork in writing before production starts, and keep the approved file.
- File the specification and the artwork together: for repeat programmes both are kept on file, so a follow-up order is produced to the same standard without re-approval.
Where the exterior meets compliance
Windows, glazing and the outline of the body are exactly the kind of specification that destination markets look at, and requirements differ by product and by market. The documents position for a configuration is therefore confirmed against the market you are selling into before the order is placed, not after the body is built. Change the glazing or the layout after the specification is signed and you have changed the thing the documents were checked against — which is the reason the exterior belongs in the written specification rather than in a later conversation.
An exterior specification checklist
- Model and range named, so construction and roof type are fixed on paper.
- Fitment recorded — make, model, generation and bed or chassis dimensions.
- Body colour stated as a single brand standard, or per model if the mix calls for it.
- Window count per side confirmed, with the layout written into the specification rather than assumed.
- Livery artwork supplied, positioned and matched to the panels it applies to.
- Badged items listed — decals, packaging, manual and warranty wording.
- Compliance position confirmed for the destination market against this exact configuration.
- Artwork approved in writing before production, and filed next to the specification.
- Repeat-order file created, so the second container does not restart the conversation.
The exterior is the least technical part of a camper programme and the most visible when it is wrong: a window layout that does not suit the climate, a colour that shifts between orders, a decal that no longer matches your brand. All three are settled in the specification stage, in writing, and cost nothing to get right there. Send us the market you are opening, the vehicles you sell into and the identity you want the units to carry, and we will put the exterior into the written specification so the quotation and the production order both follow the same document.